Nextcloud: Mount as a Folder
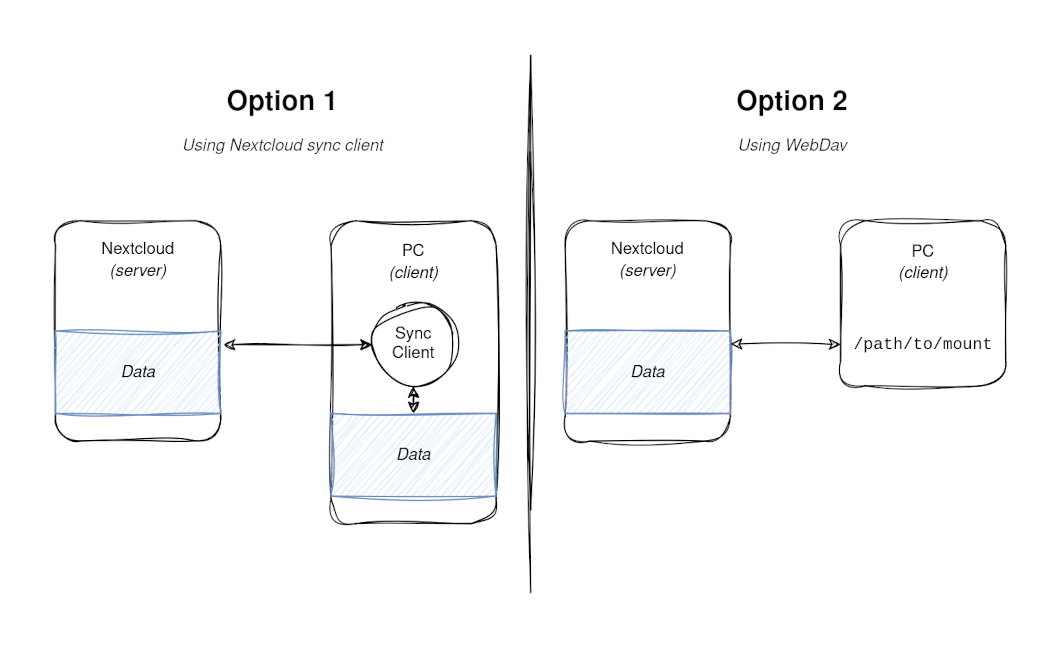
If you’ve used Nextcloud before, you’ve probably used the desktop sync client. Simply select which folders you want to sync and it will copy the files down to your computer and make sure any changes are kept in sync. Pretty straight forward. It works just like the sync client of any other storage provider (e.g. Google Drive, Dropbox).
However, this doesn’t work if you have a lot of data in the cloud, have very little free space on your computer, or cannot run the sync client for some reason. In those cases there is another way to access and browse files: WebDav
WebDav is an extension of the HTTP protocol for file transfer supported by Nextcloud and most operating systems. (wikipedia)
Put simply, it allows you to access your Nextcloud account as it it were a remote hard drive. You can mount and use it on your computer just like any other drive.
Then you can read and write files to your Nextcloud server just like you would to any folder on your computer. All without having to sync everything down and run the sync client.
🔧 Setup
Here I break down the process of mounting a Nextcloud server as a folder on your machine.
1. Installation
For this to work, you need a piece of software to convert the WebDav protocol into something your computer can mount as a folder. On Linux a popular option is davfs2 (docs).
If you are running an up-to-date debian-based systen, davfs2 should be in the default repositories.
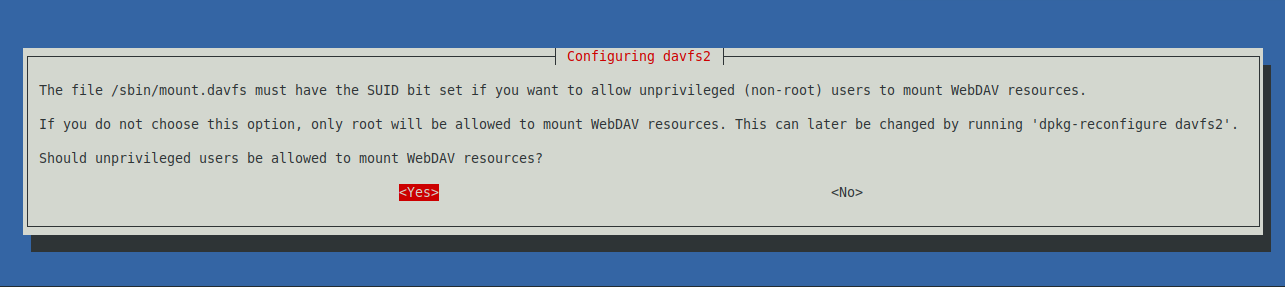
sudo apt install davfs2During installation, select the option to allow unpriviledged users to mount resources. This avoids some permission issues.
2. Find WebDav Link
Next you need to find the WebDav link you want to use. Nextcloud shows this information in the sidebard under Settings:
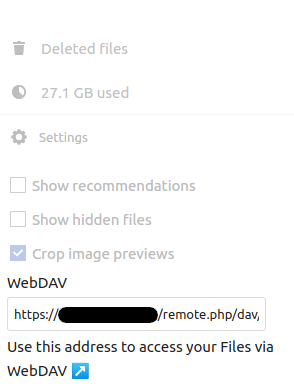
You can use the link for any folder. So you can mount your entire account, or just one particular folder that you need.
3. Mount Folder
Finally, run the mount command to mount it to a local folder:
mkdir Nextcloud/
sudo mount -t davfs <WebDav path> Nextcloud/ -o uid=1000
You will be prompted for your Nextcloud username and password.
The
mountcommand needs to be run asroot, but by proving theuid=option, the mounted files are “owned” by the provided user ID. Use the user ID of your account to allow you to easily modify them.Your user ID will likely be
1000, but you can check with theidcommand.
When you are done, you can unmount it again using umount Nextcloud/
This allows you to have your entire Nextcloud instance available as a regular folder on your computer, all without taking up any disk space!
This can be useful for a few use-cases:
- You have very limited disk space on the client
- You cannot/will not use the Nextcloud sync tool (e.g. on a headless system)
This works great, but has some drawbacks: availability and performance. Your files will only be available when you can connect to the Nextcloud server, and read/write performance will never be as good as having the files actually saved on your computer.
// the end